-->

Friday, February 22, 2013

Marie Antoinette Matchbox and ATC Swap

Recently I entered one of the best swaps I've ever done! Altered Paper Swaps keeps me really busy because I want to join in on all the fun swaps they have. You've got to check them out! Such talent and oodles of fun. The best part about this swap site is the group. They're the greatest bunch of ladies I know.
My swap partner for this swap was Angi. She's from Hawaii and is so creative!
Here's the matchbox and ATC I made for her.


If you enjoy swaps, you've got to check out this site!
I will be entering my matchbox in the following challenges:
OLLCB Challenge 124 - Sparkle and Shine
Lessology Challenge 22 - How Charming (recycled matchbox, charm on drawer and shoe)

Friday, February 1, 2013

Unique Crafters Challenge 12 Lace and Fabric

This month at Unique Crafters our challenge is to use fabric and lace. Since Valentine;s Day is right around the corner, this is the perfect occasion to bring out all the frill!

The winner will receive a prize package from Scrapbook Unique!
I chose this great new adhesive fabric cardstock by DCWV that I purchased from JoAnn's. The ribbon, lace and key came from Michael's and the rose from Wild Orchid. I used a scalloped heart punch from Fiskars and cut the pink background with Spellbinders Label 17. Liquid Pearls edged the heart and accented the background.
You have until the end of the month to submit up to 3 projects for our challenge. It can be a card, layout, altered art, anything that is uniquely you!

Friday, January 25, 2013

A Labor of Love

This is the first video I've ever done. I'm not very "tech savvy", but with the help of my awesome geeky brother, Rick, I did it! This is dedicated to all the abused, neglected, and forgotten animals that need us now. We need them, too. Please share, adopt, and donate to rescues so they can continue to help these precious animals that deserve a wonderful life, a warm home, and love. Help spread the word and let's educate everyone on the perils of puppy mills, backyard breeders, Breed Specific Legislation (BSL), and dog-fighting rings. Do it for them - it will make your life worthwhile.

http://www.youtube.com/watch?v=z6y5YqcaL7E


This is Timmy, who we adopted and named Buddy. He's not been given a second chance, but a first.
He's only a little more than a year old and spent his young life in a small crate 24/7. He was allowed out only to stud and be used as bait for dog-fighting. This was not the life he chose, but that of heartless, uncaring, uneducated individuals who used him and others for their monetary gain. Well, Buddy said, "Get a job, loser! I don't want to fight." If you turn your back on him, you're turning away an opportunity to better your life and his. Let's stop this now!

Saturday, January 12, 2013

MTC Layering Tutorial

If you use a cutting system connected to your computer you know how much fun it is to cut any image you desire in any size you need. But, did you know that some programs will also print?
Several years ago I purchased and downloaded Make The Cut. I connected a USB cable from my Cricut Expression to my computer and I was cuttin'!
Little did I know that soon after that Provo Craft initiated a huge lawsuit against MTC, so now Cricut machines aren't compatible with the current version of MTC. There was an agreement made, however, to allow current subscribers to continue to use the program they purchased. YAY! The only catch, you cannot upgrade your MTC version OR Cricut version. Okay, I can live with that.
While playing around with all the awesome functions (shadow, boolean, weld, join, etc.) I noticed "File" in the upper left hand corner. When I clicked on it I found a whole new aspect of MTC. I can print? Oh yeah, baby!
Not only can you print a basic shape (and then cut the same shape if you desire), you can layer different colors. I love the ability to print white letters on a different color background. It's so much fun and so easy. Here we go!


Select what image you want to layer and print. I'm making a Valentine ATC .
I chose Poor Richard font for the L,V, and E, then grabbed a heart from Basic Shapes (MISC Section).
To make the heart hollow, click the shadow button (I used mitered option so the bottom of the heart wouldn't be rounded) and made it as close I could to be about the same width as the letters.

Next, click on the Boolean function and choose the 2nd option, B to A.

Place your heart and letters how ever you like. Then weld.
Okay, your "love" part is done, let's add a sentiment to go inside.

I changed the font to "Casua", but any are fine. Script fonts look really nice, too.
I used the "TT" function to type "All you" (enter), then "need", (enter), then "is" and enter. This way I can manipulate the words in a way to easily fit in the heart. Re-size pushing in the corner arrows until you get the perfect fit.
Next, highlight the sentiment and click the :new layer" button (R) hand corner. This will separate LOVE from the sentiment. Now, choose a color you would like for your sentiment. I choose dark yellow (actually looks like a dark celery).

Now we're ready for a background color. I could color the LOVE and leave the background white, but why not mix it up a bit? I went back to Basic Shapes and chose a rectangle from "polygons". I enlarged it to exactly 2 1/2" x 3 1/2" (ATC size). Now,  create a new layer for our rectangle.
Click on "LOVE" again, make a new layer (every time you change or add something, you need to re-make a new layer). So, even if you've think you've already made a "New Layer" for an image, it (the layer) will change when you add a new image to your mat.
Using the color palate, choose white, Your image will be outlined in red (won't print red) so you can see where it is.

Now, highlight LOVE and drag over your background. If you can't see it, just click "New Layer" again and it will show up over your background. ***You cannot weld because you have 2 different colors***
Next, hit New Layer again (yeah, you'll get used to doing this a lot!) and add your sentiment inside the heart. If it's too big, just click on it and push in the arrows to shrink it.

You're ready to print your 3 color image! Go to "File", click on the "Print Preview" (to make sure you're inside the margins), then PRINT!
Just get in there and start playing with different options. Trial and error have been my best teachers.
There are also forums and workshops for most of the cutting programs.
Good luck!
Here's my finished ATC
I added Liquid Pearls and punched some little hearts for embellishing.
I hope you've had as fun learning about new functions as I've had showing you! Have a fun crafty day!


Friday, January 11, 2013

Altered Paper Swaps

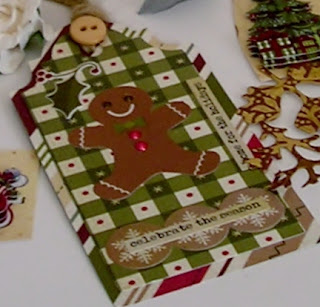
We have a new address at the Altered Paper Swaps . It's so easy to sign up for awesome swaps and view what we're doing. Here's a few pics of recent swaps.
Twas the Night Before Christmas ATC  for Donna

 January 2013 Tag a Month for Fran


 Tag for Tee (front)*

 Tag for Tee (back)
* because she is so special!

 December 2012 Tag a Month for Oliva

 November 2012 Tag a Month for Amy Jo

Father Christmas Tag for Valery Anne

This month we have several really fun swaps going on. A #8 "All You Need is Love" Valentine tag Swap, a Marie Antoinette ATC and matchbox swap, as well as the regular monthly tag and ATC swaps. We'll be doing an altered teacup swap and a button swap! If you're looking fun and would like to share your art,  stop by and check it out! You may wish to join in on the fun! We'd love to have you!

Tuesday, December 4, 2012

Deck The Halls!

 
.....with boughs of holly!
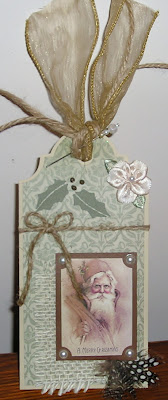
Today is Tuesday and that means another tag! The theme this week at Tag Tuesday is "Deck The Halls" and they are making gorgeous tags using holly, berries, ivy, or any type of decoration for a Christmas tree, etc.
I made this tag for The Father Christmas Tag Swap at The Altered Paper and thought it would be perfect for today!

The image is from Joanna Sheen's Victorian Christmas CD and the background paper is from The Paper Studio. I made the hat pin and everything else was stash. Oh, the tag svg was a freebie from Bird's Cards.
Make sure you pop over to Tag Tuesday to look at all the marvelous tags they'll be showing this week!

Saturday, December 1, 2012

Unique Crafters Challenge #10 ~ Christmas

 
Oh goody,goody, goody! I'm really getting into the Christmas spirit! I finished my shopping in August, which is my yearly deadline. I've done this every year for over 30 years. I'd much rather be enjoying the season instead of worrying over last minute gitfs. Most of my gifts are wrapped and my Christmas cards are made. Now I can just sit back, watch Christmas movies and drink hot chocolate!
This month we're celebrating Christmas at Unique Crafters Challenge. You can make any craft you like (and there are so many ideas for Christmas)! The winner will receive a $10.00 gift certificate from Cedar Chest Designs! Yay! Go check out all the lovelies they have. There are several freebie images and oodles of fun Christmas images. AND, if you use one of their images, you will be entered into an additional random drawing for a $35.00 gift certificate!


I made this Christmas ensemble for a Christmas tag swap. We always add little goodies to our package to send, so I made a cracker box and filled it full of fun crafting things for her to use on future projects. Click here for the free downloadable cracker box from Crafting Cachet. She has oodles of fun freebie downloads!


Supplies used:
Unique Crafters: Simple Stories printed Christmas cardstock, matching stickers
Birds cards: free tag template
Michaels: twine, beige cardstock, buttons, stickles
MTC cutting program
fiskars paper cutter
Scotch ATG 700 tape gun
Zig 2 way glue
You have until the end of the month to enter your Christmas project. Good luck!